Mailtiv portal guide
In the portal you design signatures or upload your own HTML, assign them to signature groups, departments and domains, schedule campaigns and manage user roles. Each person gets one signature: their signature group first, then their department, then the company signature for their domain; a running campaign overrides it.
The portal is at my.mailtiv.com. What you see depends on your role (see roles). The portal is available in English and Turkish; change the language from the top bar.
Dashboard
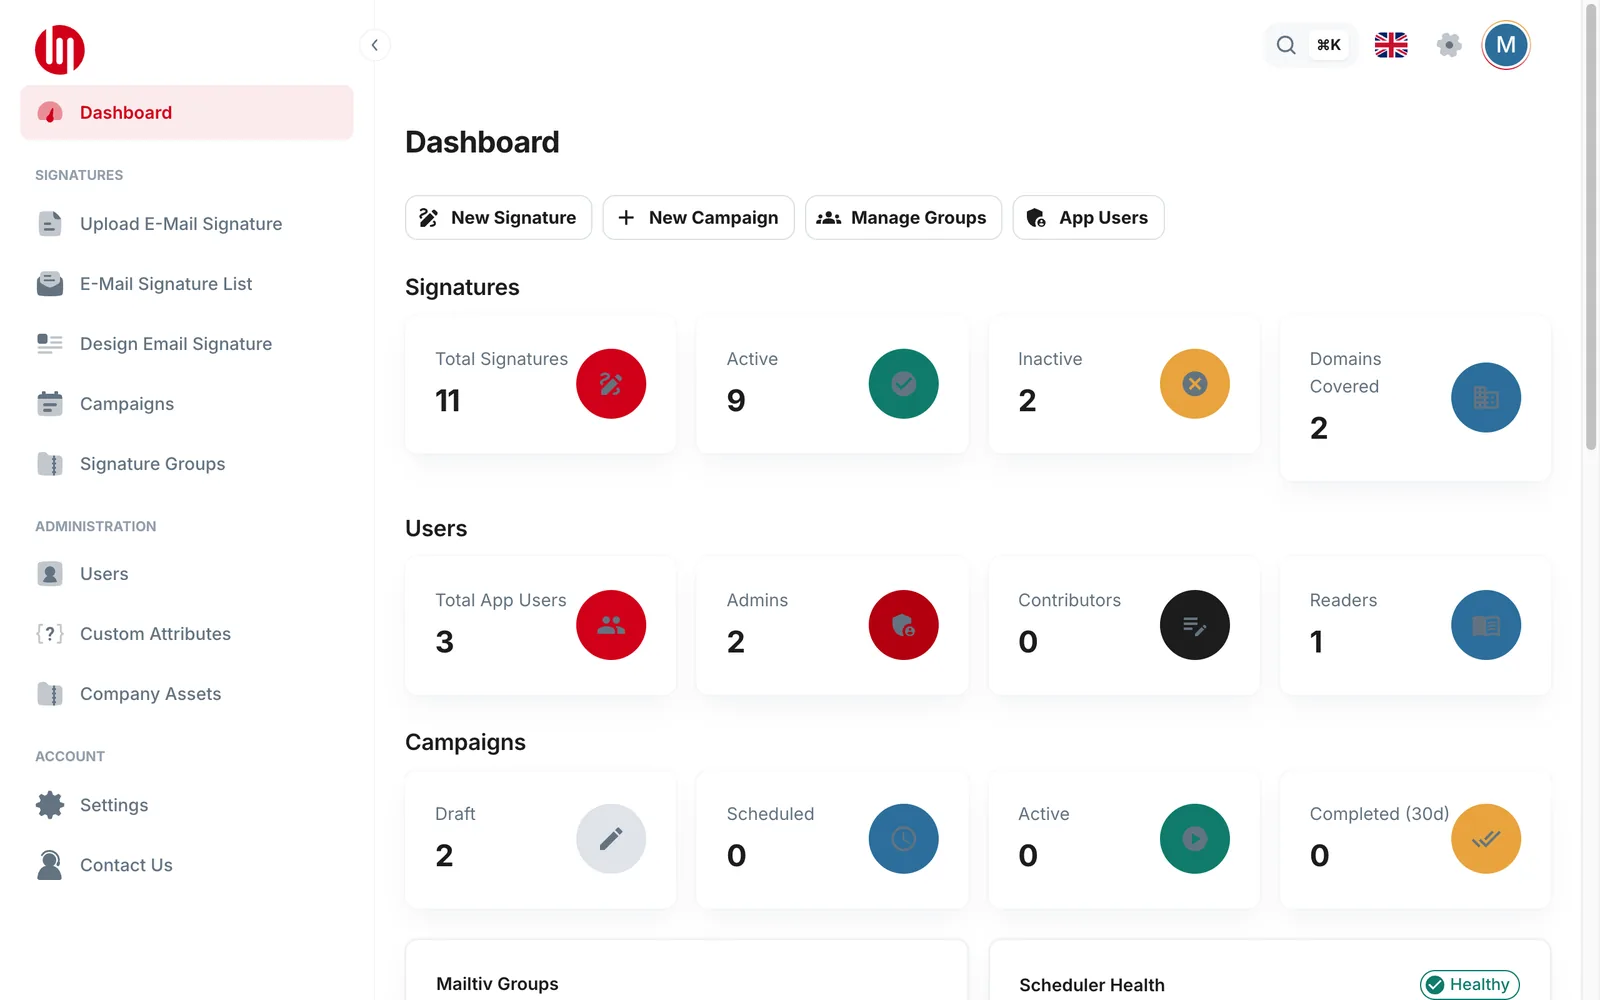
Your starting point:
- quick actions (New Signature, New Campaign, Manage Groups, App Users);
- how many signatures, groups and campaigns you have;
- whether campaigns are switching on time.
Company Assets
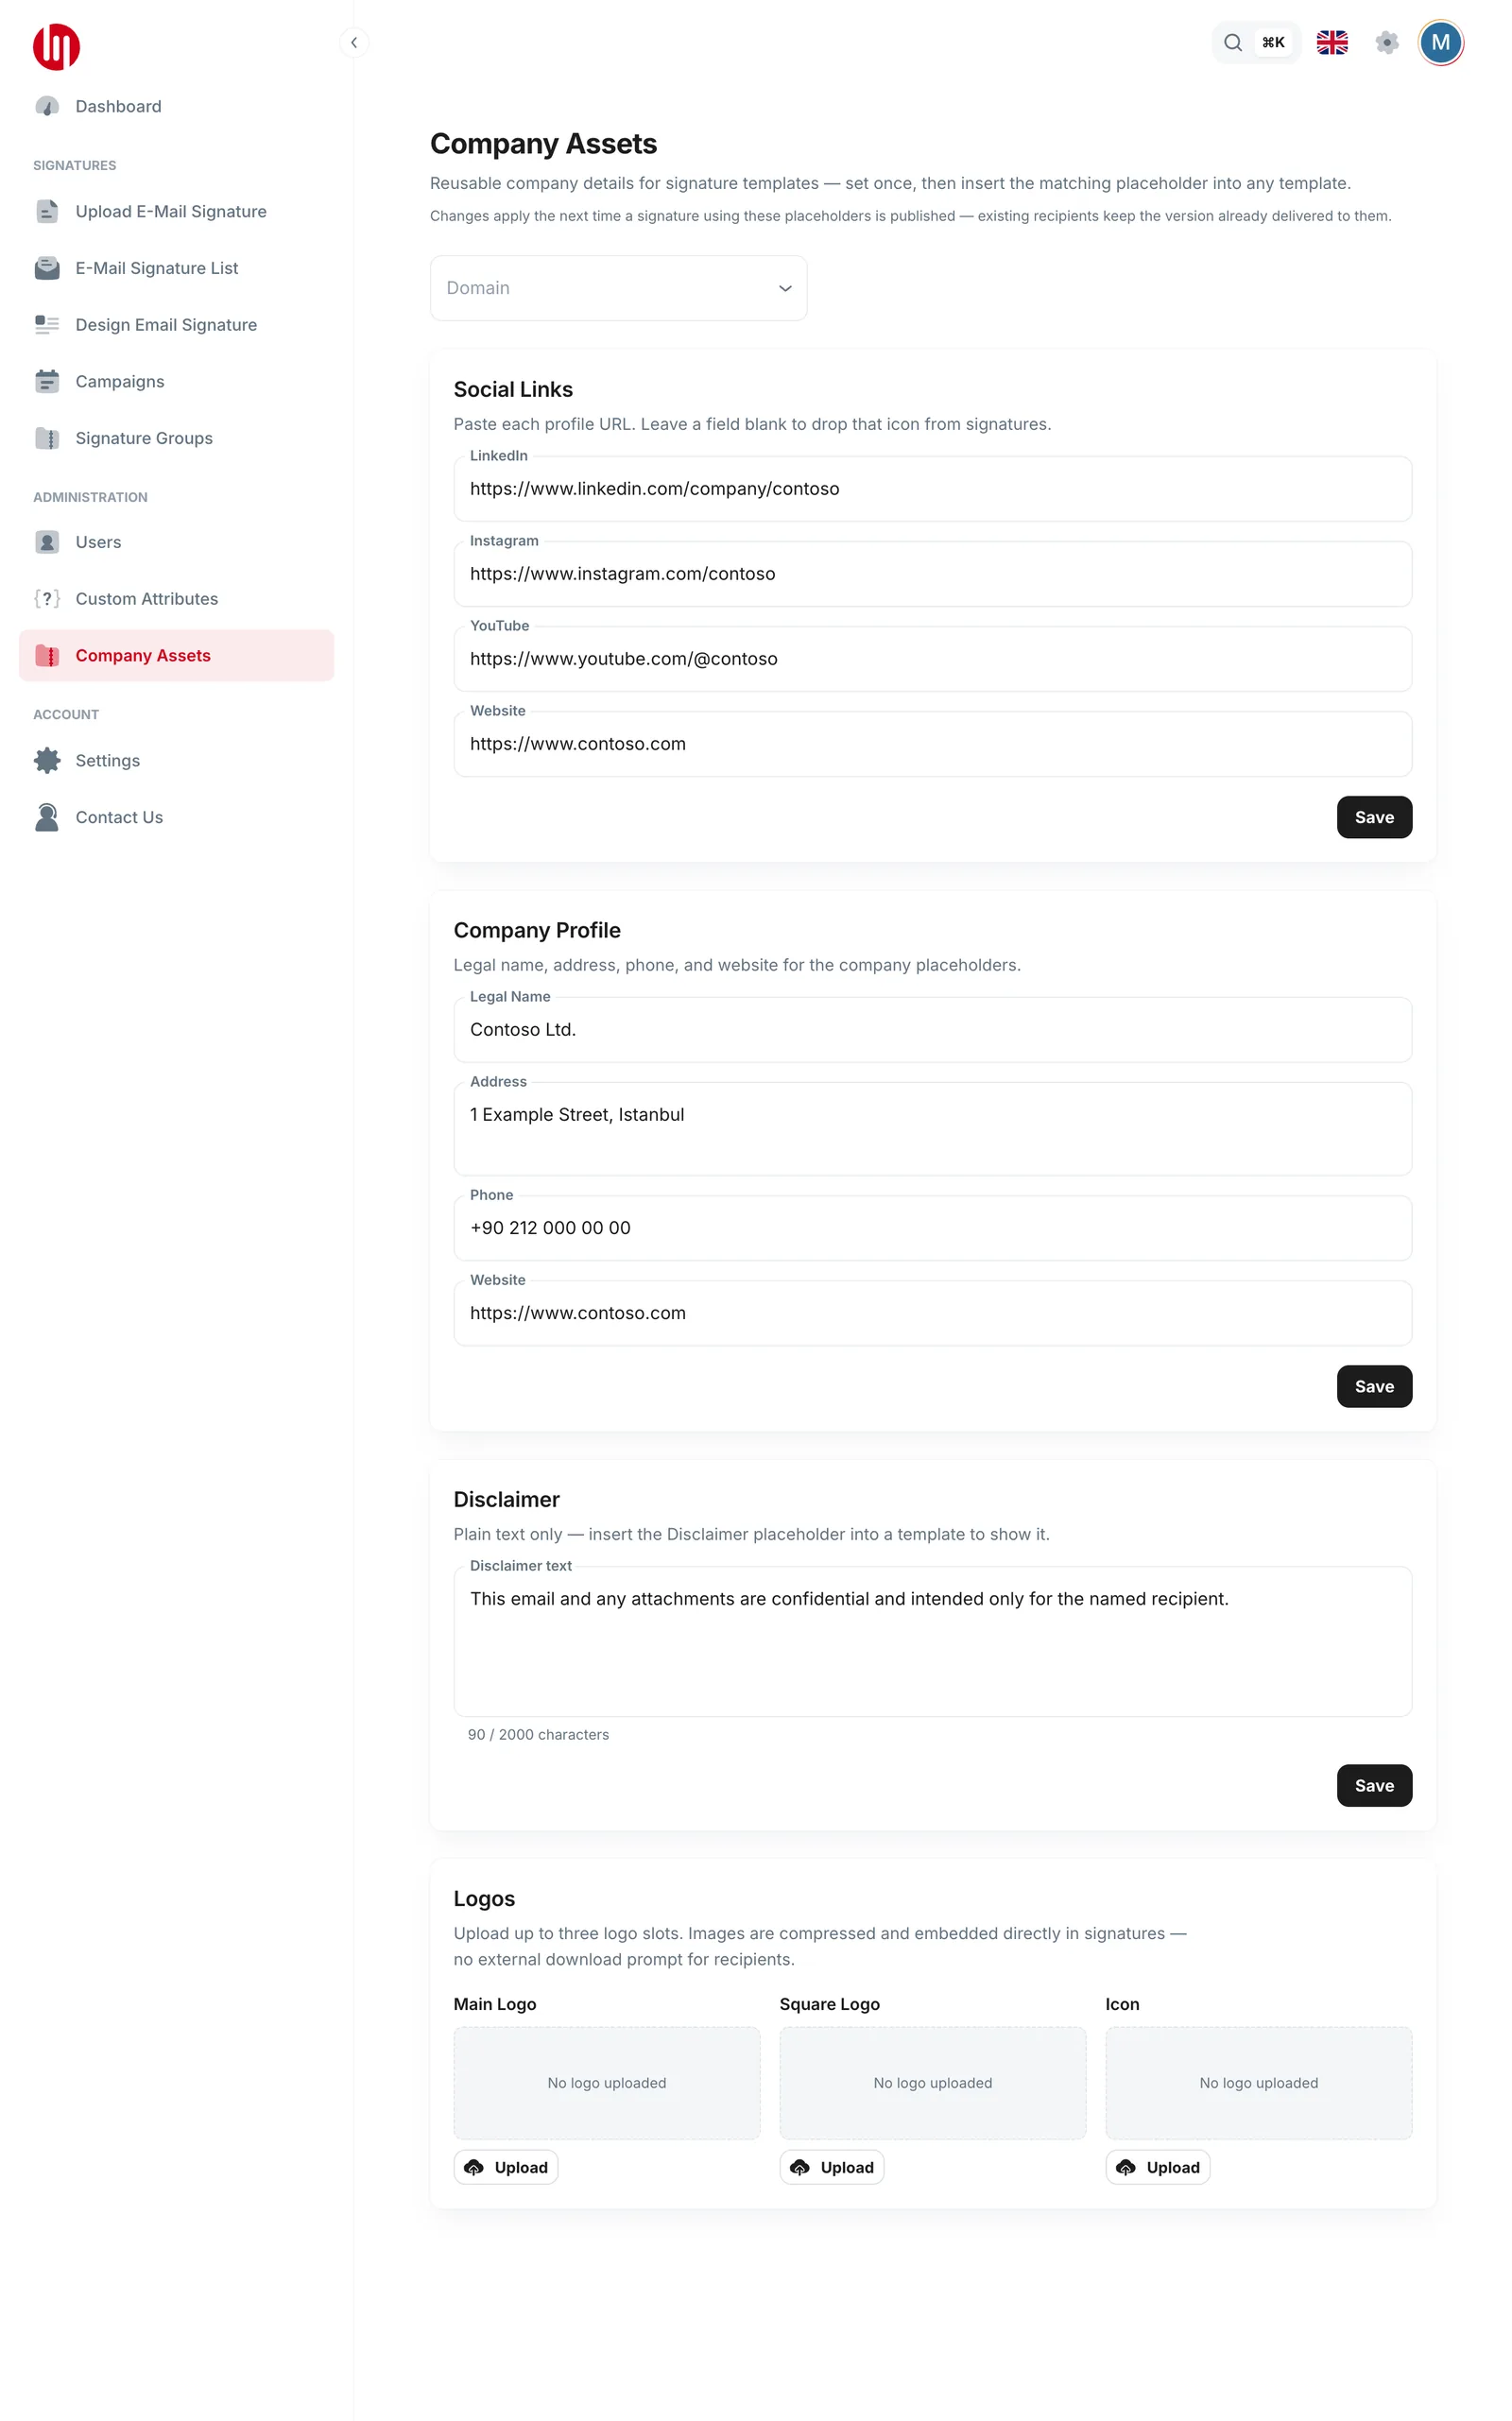
Details you set once and reuse in every signature:
- Social Links: LinkedIn, Instagram, YouTube, Website. Leave one empty and its icon disappears from signatures.
- Company Profile: legal name, address, phone, website.
- Disclaimer: plain text, up to 2,000 characters.
- Logos: up to three (Main, Square, Icon). Logos are compressed and built into the signature, so recipients don't have to download images. Keep them simple: each logo must fit in about 8 KB.
Several brands or domains: choose a domain at the top to set different assets for it. Anything you don't change is taken from Default (all domains).
Changes show up in signatures the next time a signature that uses them is saved.
Design Email Signature
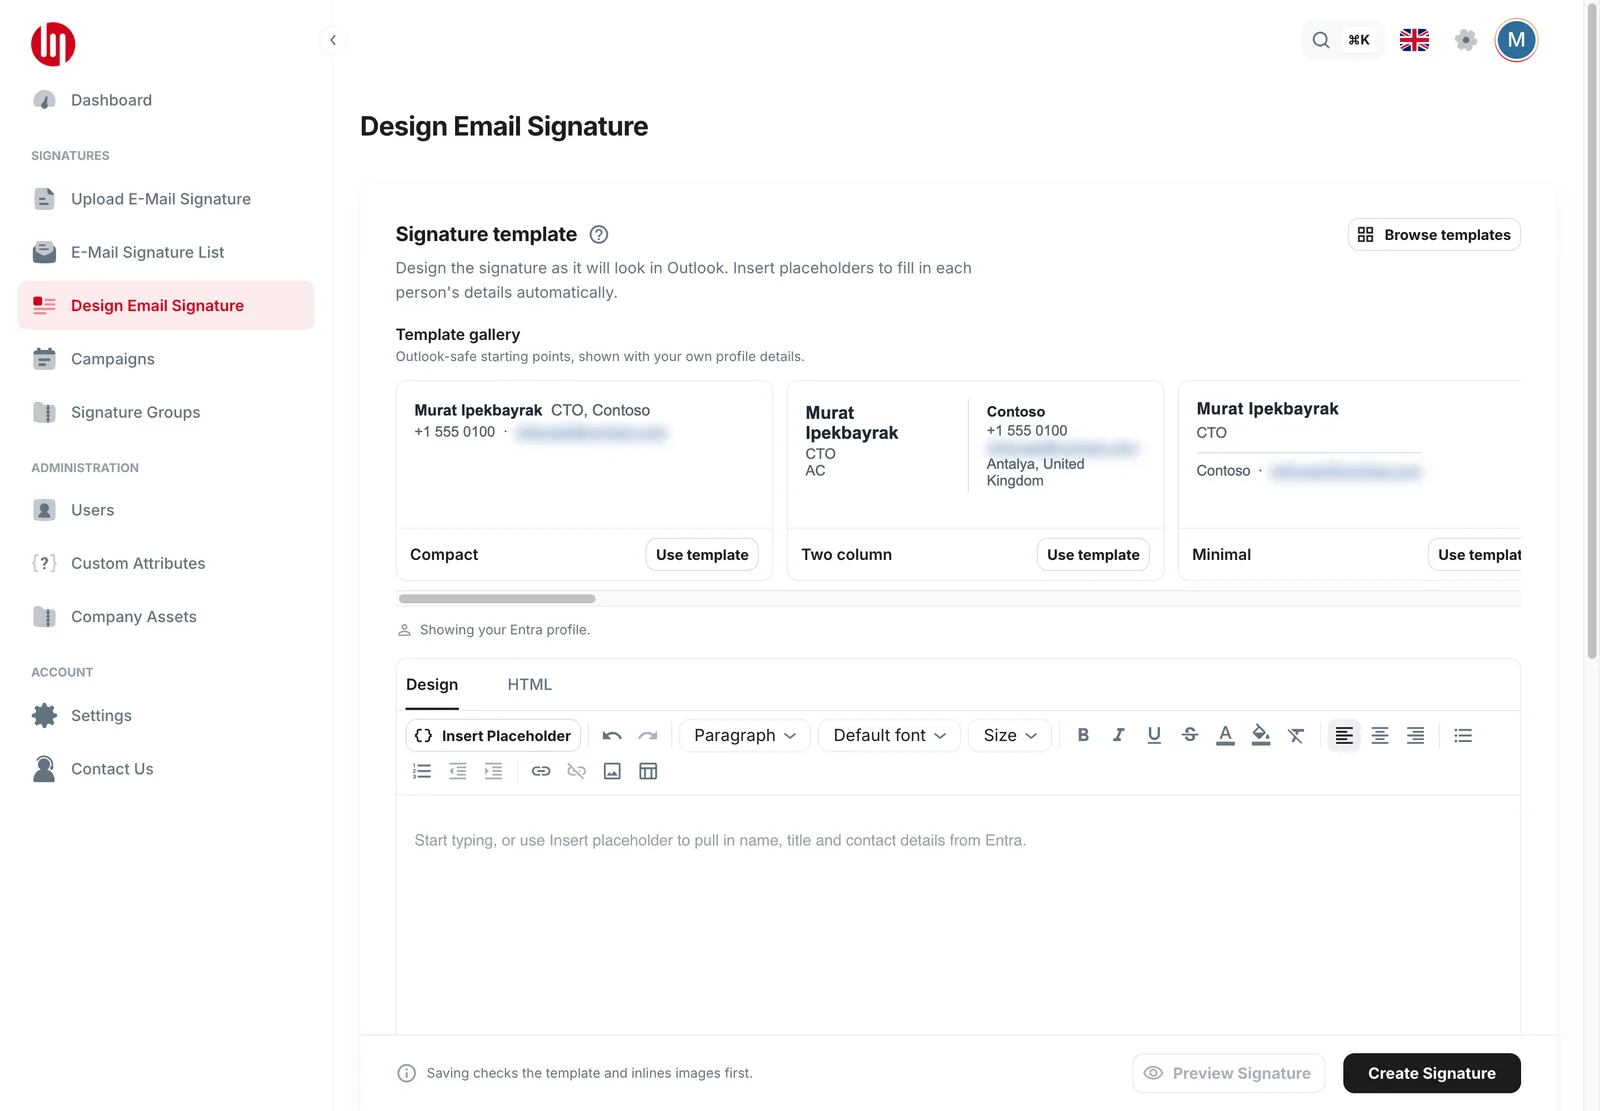
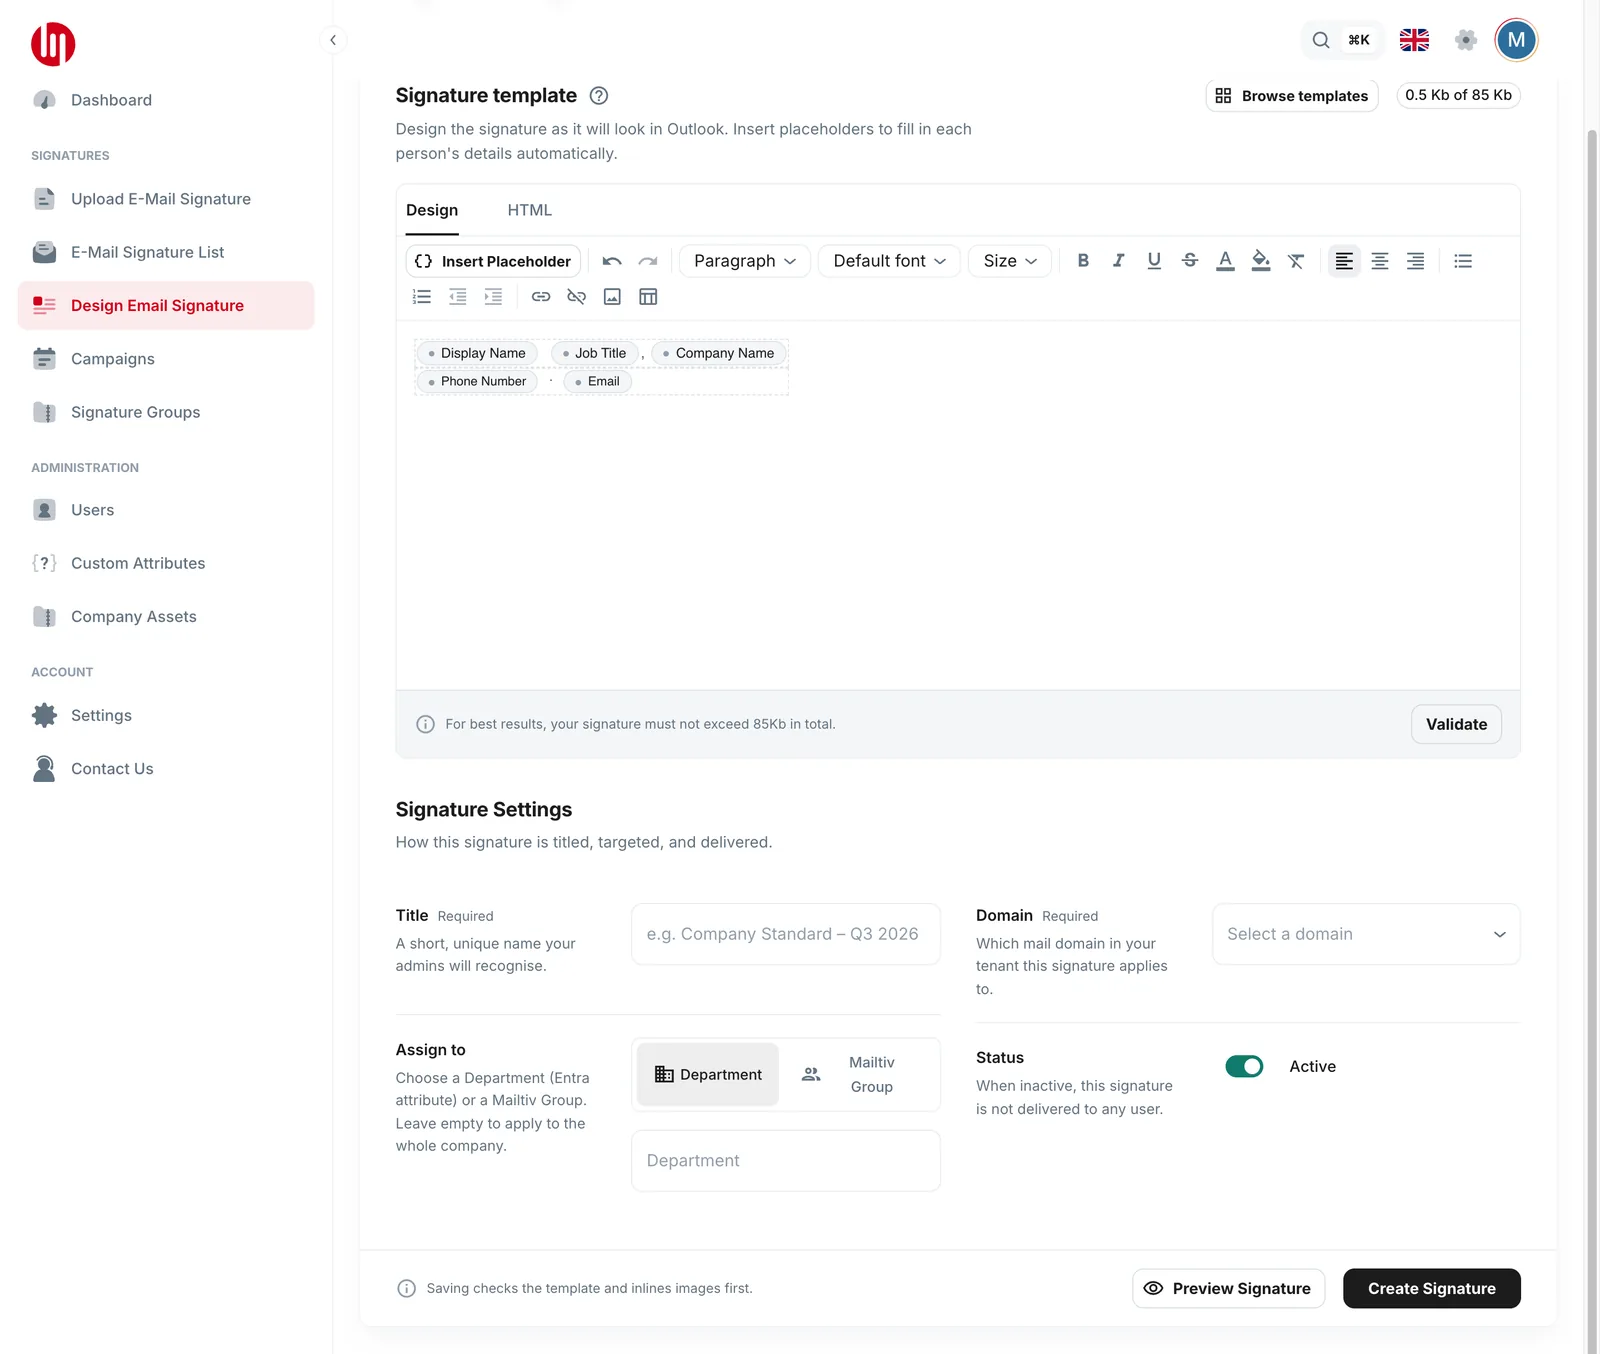
- Open Template gallery and choose a starting point. There are 16 Outlook-safe templates, shown with your own details.
- Edit in the Design tab, or switch to HTML if you prefer code.
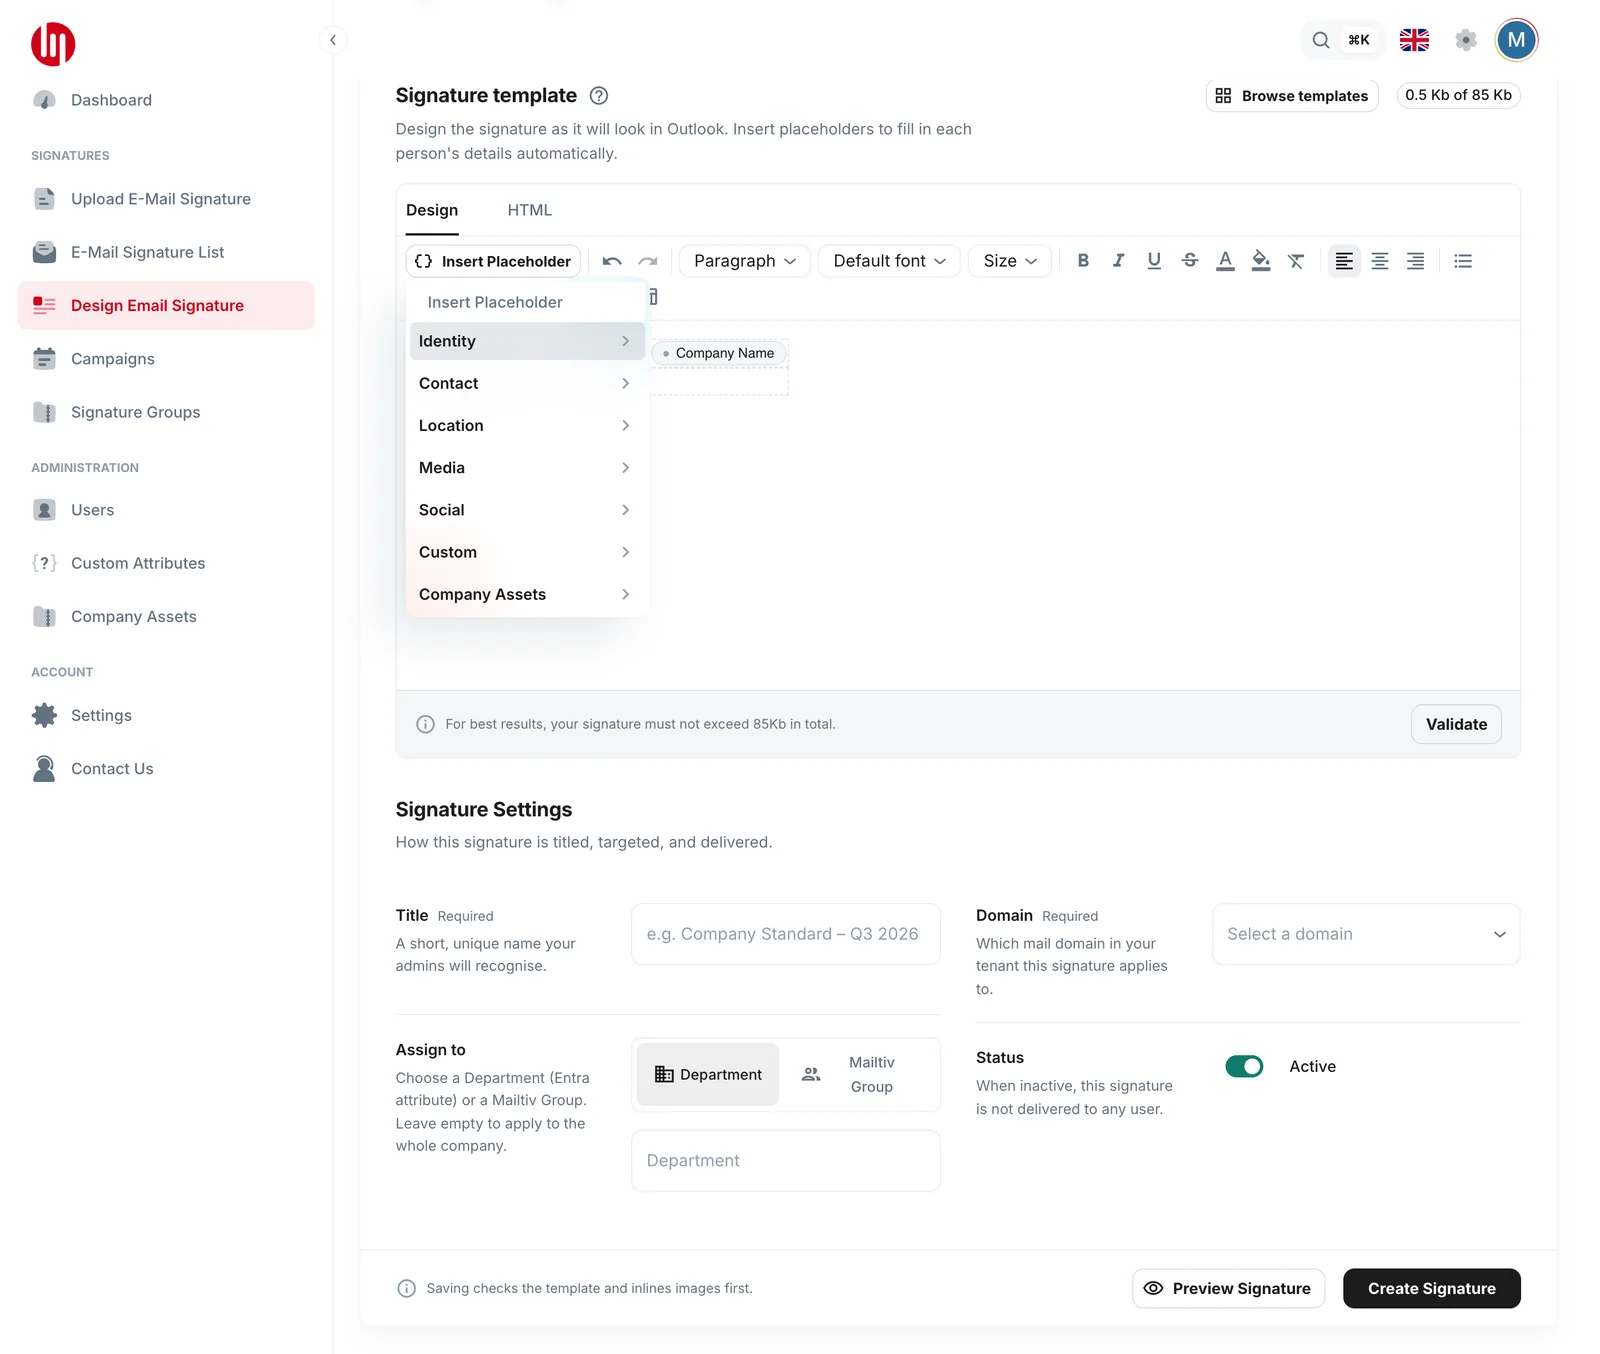
- Use Insert placeholder to add each person's details (name, title, phone, photo, QR code, company assets…). Every user then gets their own details.
- Preview shows the signature with your own profile.
- Keep an eye on the size meter (x Kb of 85 Kb). Smaller signatures load faster and won't be cut down by Outlook.
- Fill in Signature Settings and save. Saving checks the template and builds the images into it.
Upload E-Mail Signature
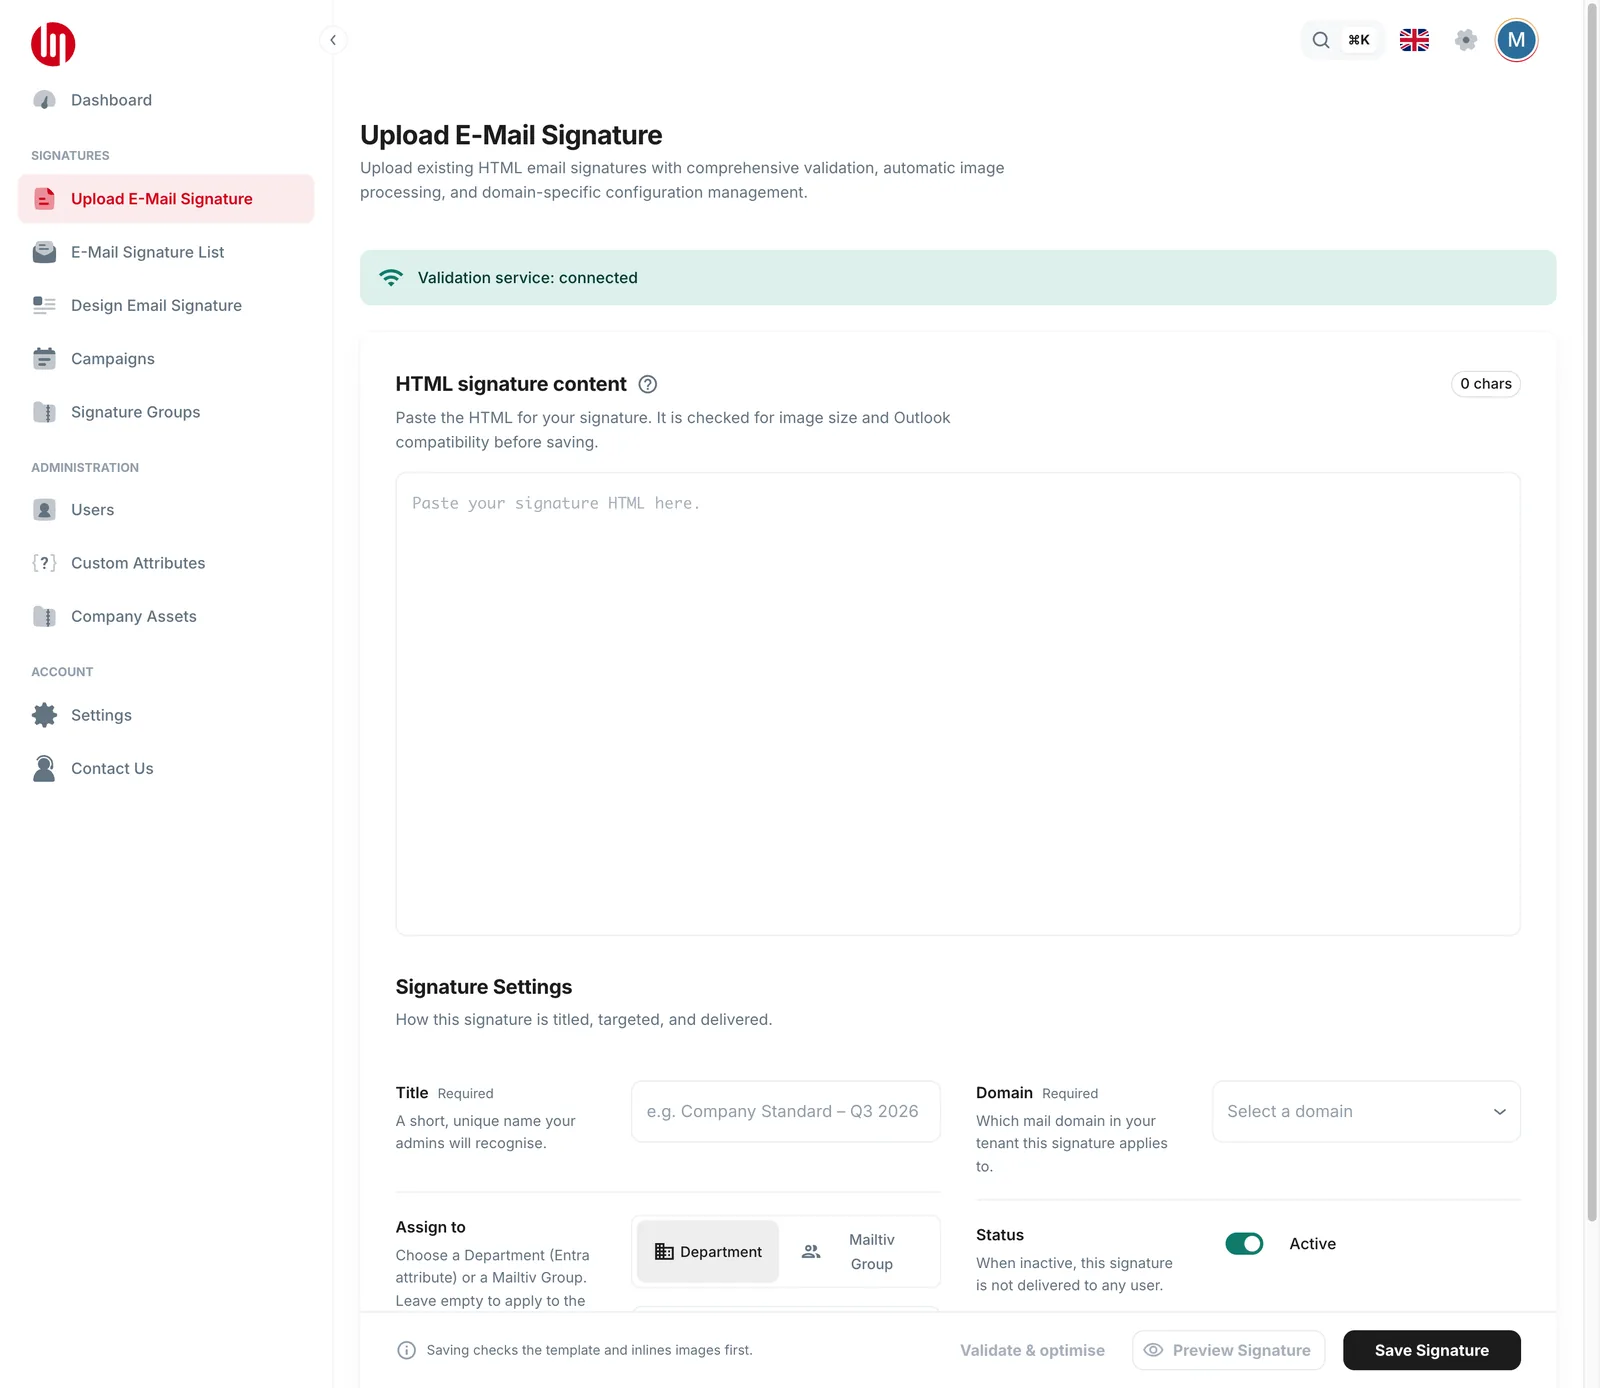
Already have an HTML signature?
- Paste it in.
- Replace the real name and title with placeholders. See sample HTML shows how.
- Select Validate & optimise. Mailtiv checks image sizes and Outlook compatibility and tells you what to fix.
- Fill in the settings and save.
E-Mail Signature List
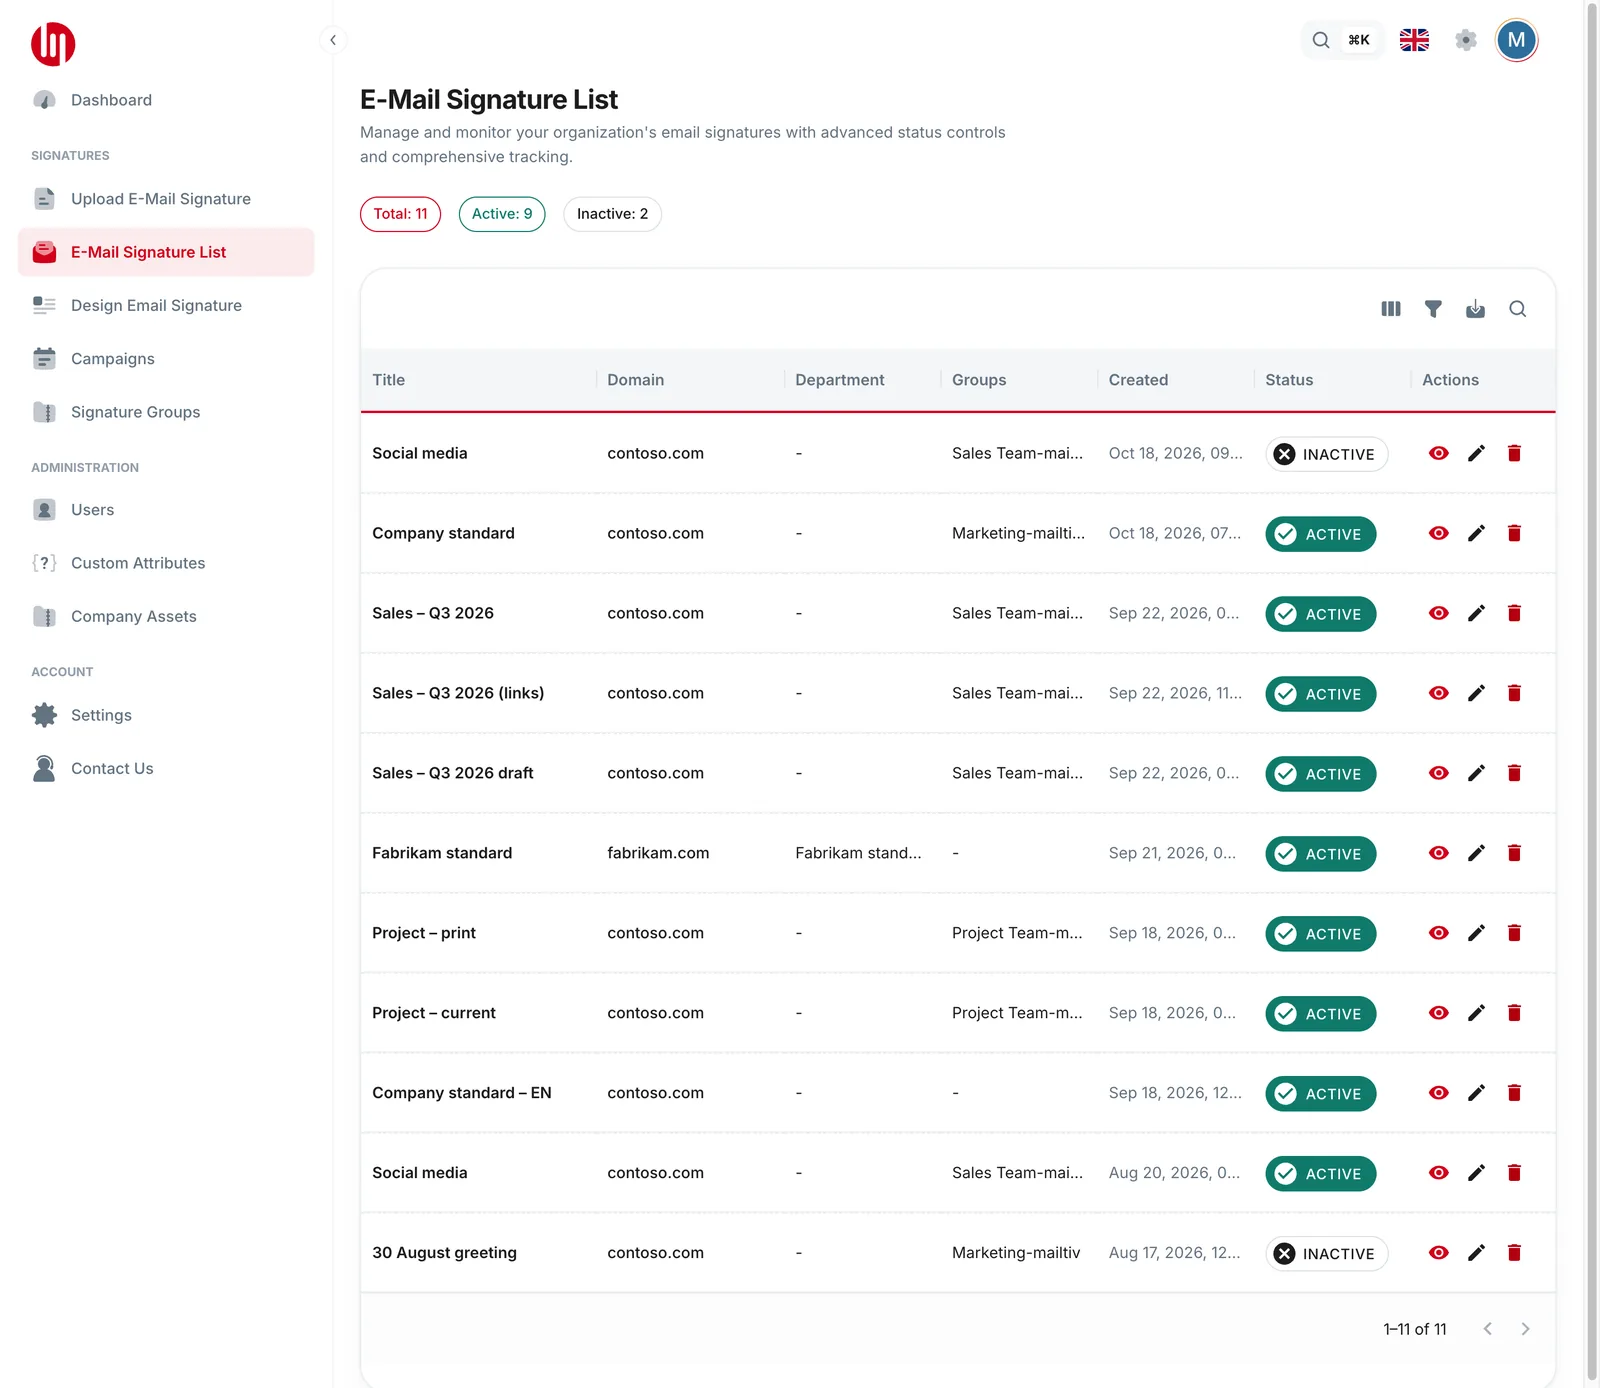
All your signatures in one place. From here you can:
- preview a signature;
- switch it between Active and Inactive (inactive signatures go to nobody);
- set the Default for a domain;
- see which campaigns use it;
- delete it.
Older signatures may offer Convert for the editor so you can edit them in the designer.
Who gets which signature
Each person gets one signature, chosen like this:
- If they're in a signature group, they get that group's signature.
- Otherwise, if a signature is set for their department, they get that one.
- Otherwise, they get the company signature for their email domain.
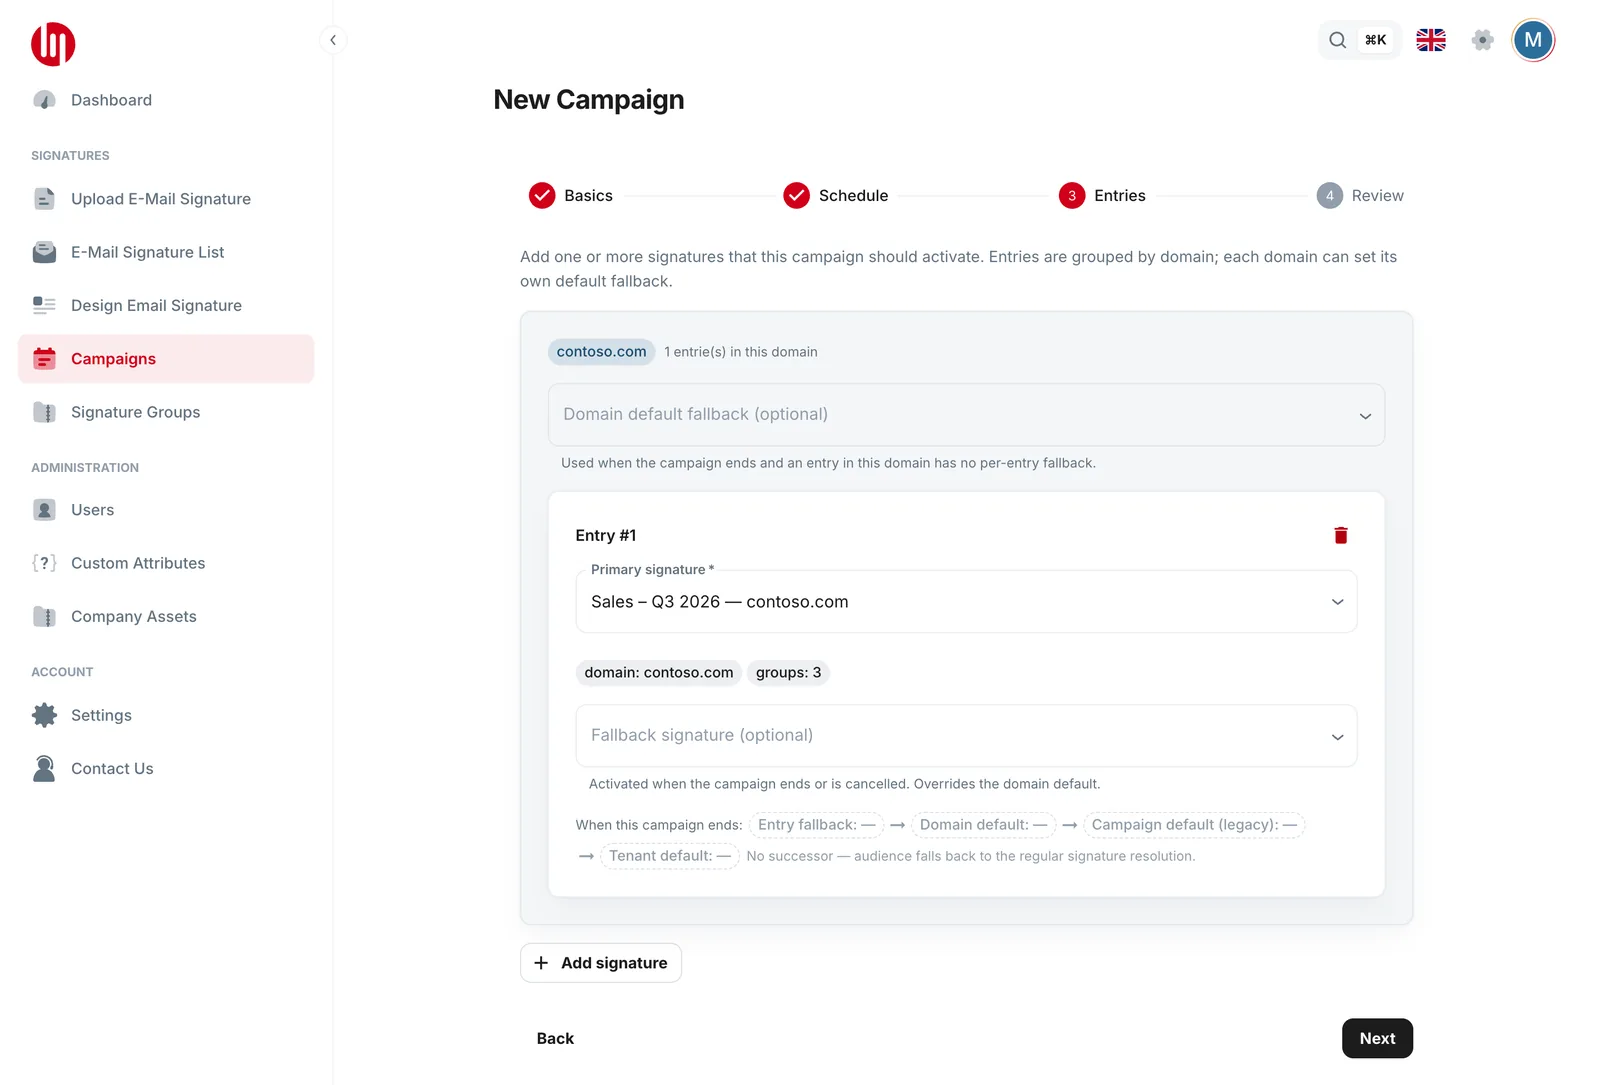
While a campaign is running, it replaces the signature of the people it targets. When it ends, they go back to their normal signature or the fallback you chose.
Departments come from the Department field of each user in Microsoft 365.
Signature Groups
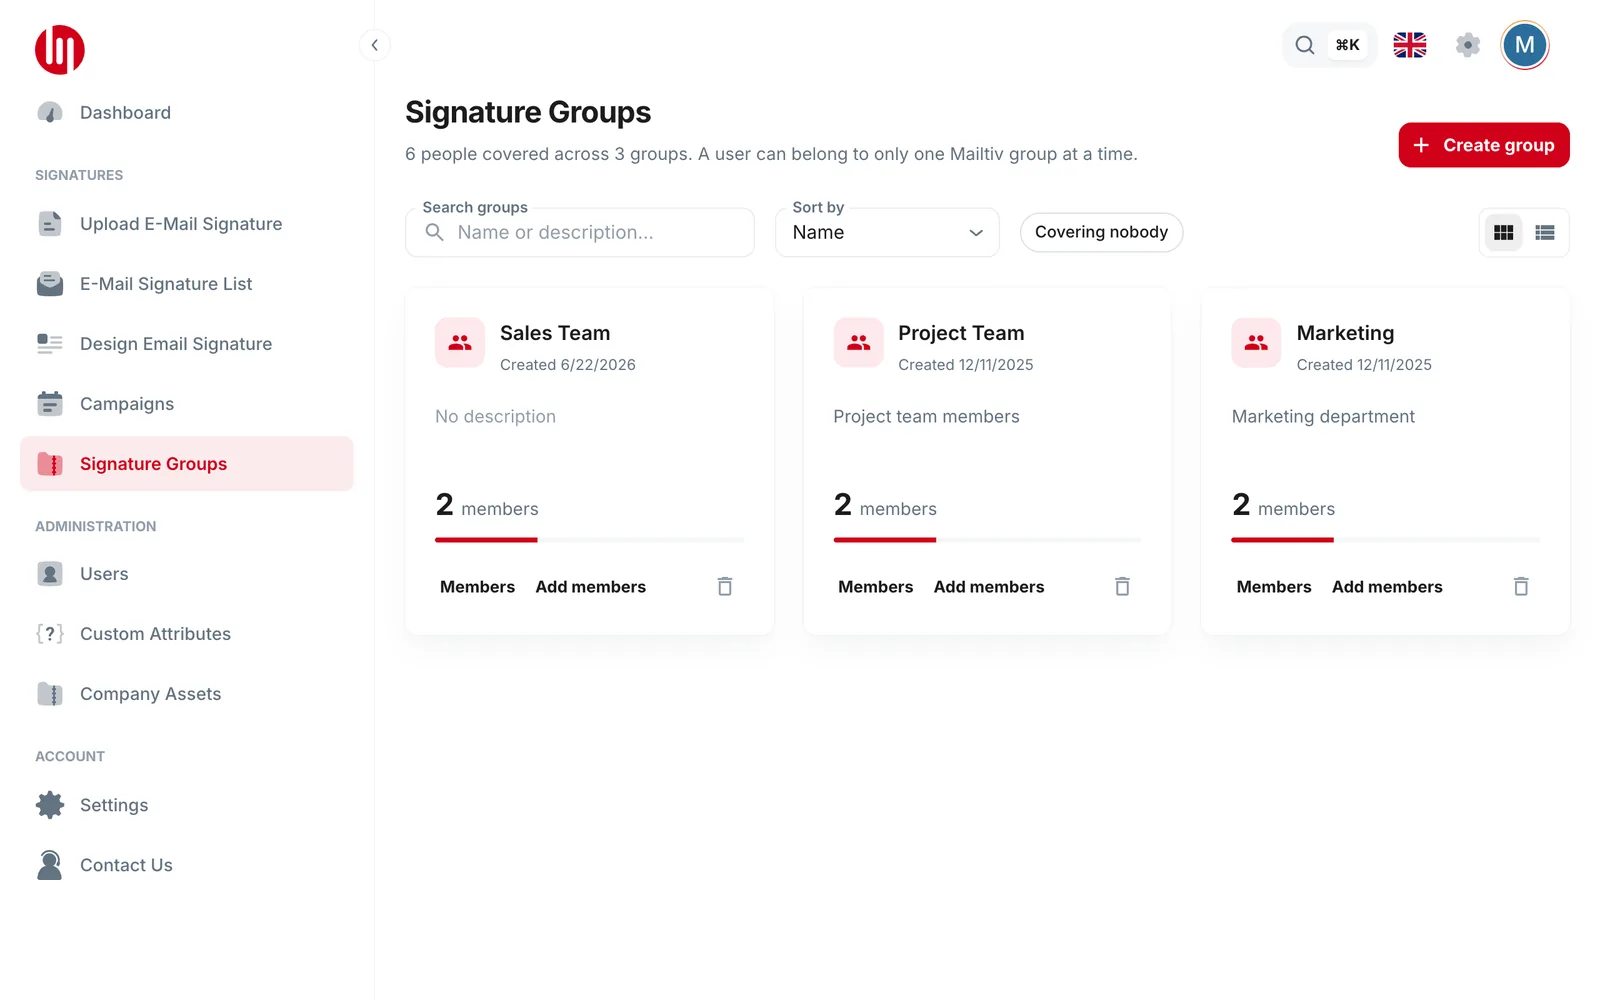
Use groups when a signature should go to a hand-picked set of people, for example a project team or the sales team, rather than a whole department.
- Create group: give it a name and a description. Mailtiv adds "-mailtiv" to the name.
- Add members: search by name or email, or paste email addresses.
- Keep each person in one Mailtiv group. If you add someone who's already in another group, Mailtiv asks you first. If you choose Add anyway, they're in both groups, but Outlook adds only one group's signature automatically. They can pick the other one under My Signatures in the Mailtiv pane.
- Then create a signature and choose the group under Assign to → Mailtiv Group.
Only Admins can manage groups.
Campaigns
A campaign switches signatures on and off by date, for example for a trade fair, a holiday greeting or a product launch.
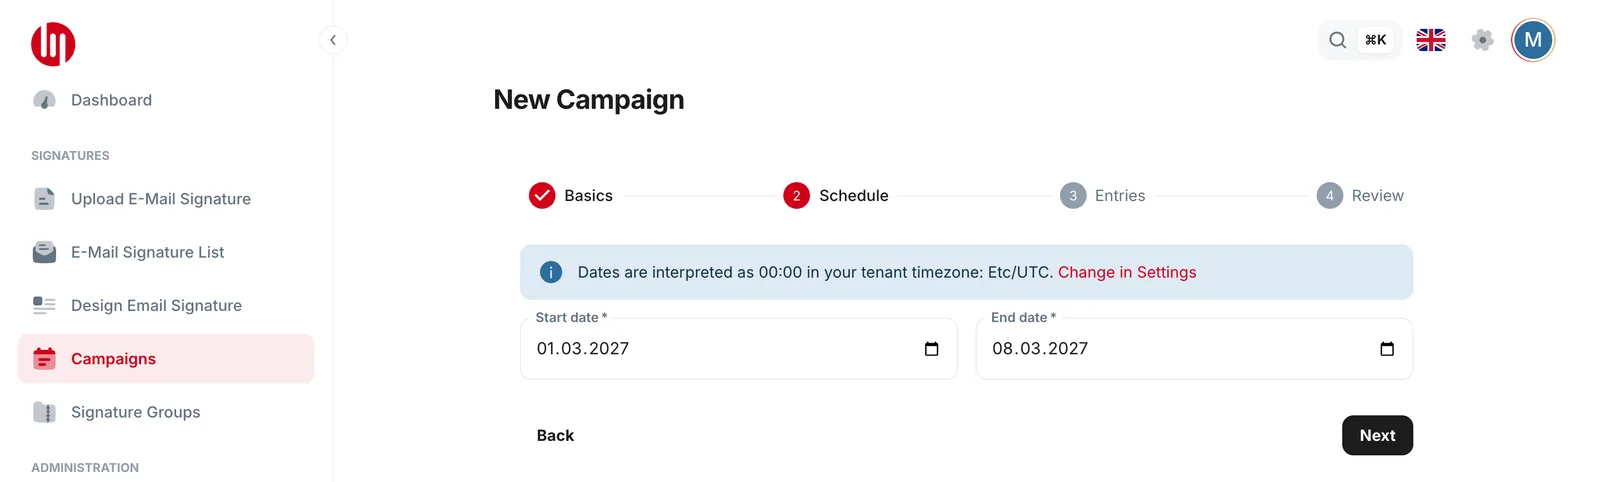
- Select New Campaign.
- Basics: give it a name.
- Schedule: set the start and end date. Dates start at 00:00 in your company timezone (set under Settings → Regional).
- Entries: pick the signature to use (Primary signature) and, optionally, the one to switch to when it ends (Fallback signature).
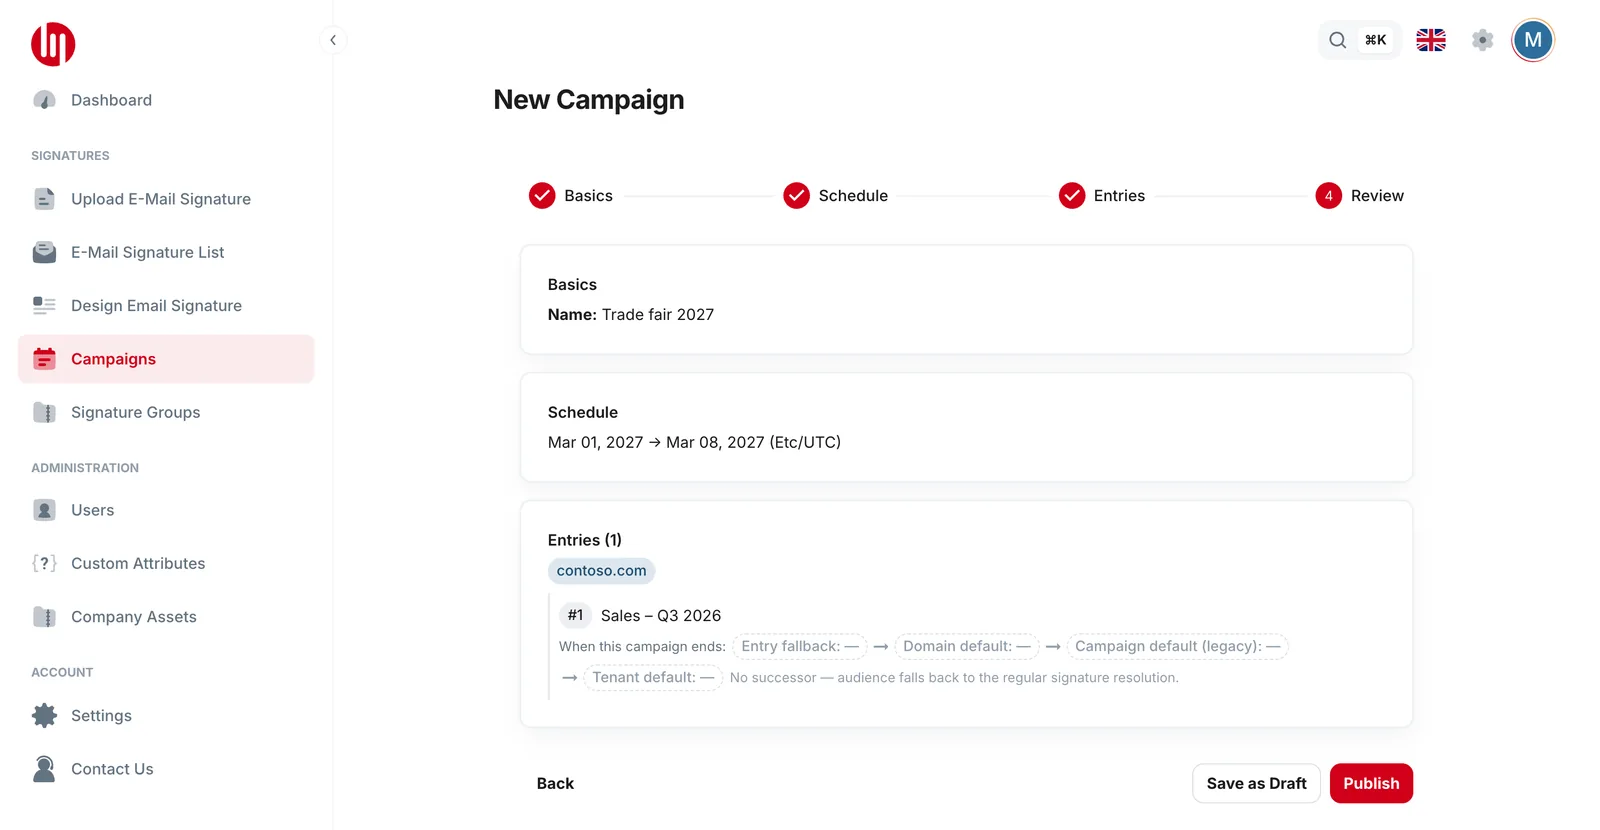
- Review, then Publish. Or select Save as Draft to finish later.
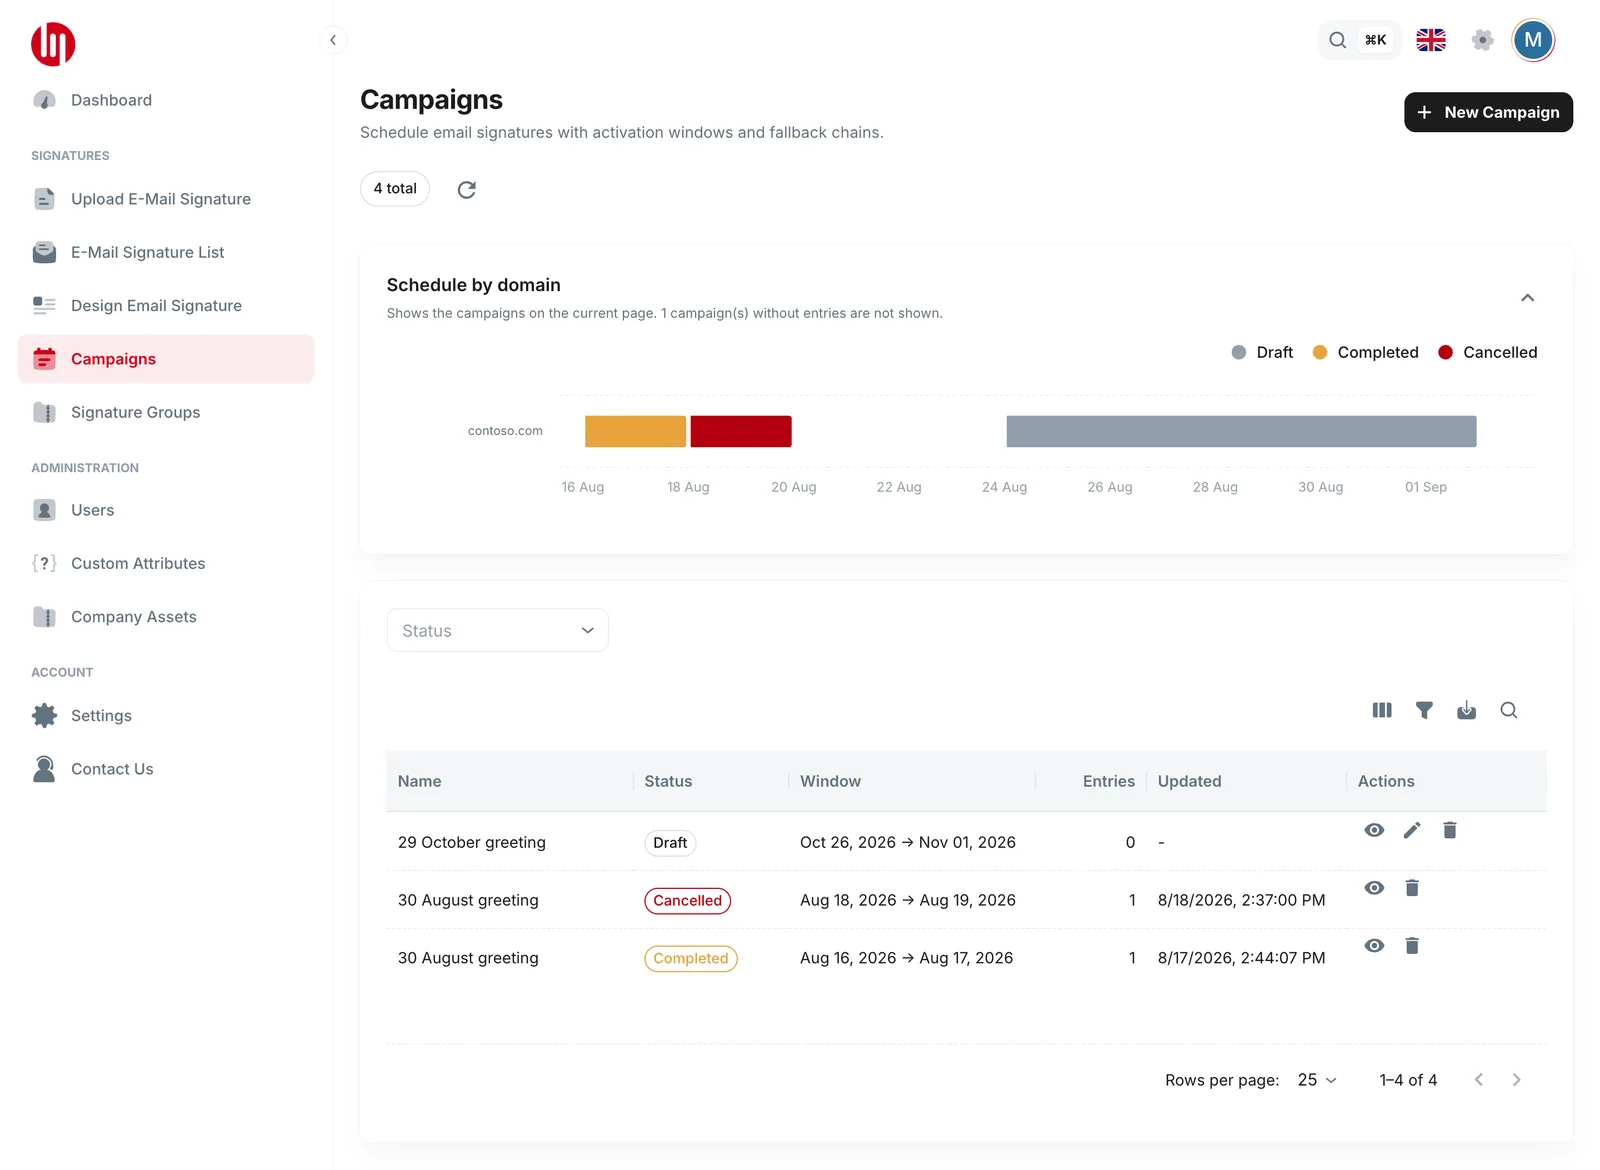
Your campaign is saved as a draft as you move through the steps. If you leave the wizard early, you'll find the draft in the list; delete it there if you don't need it.
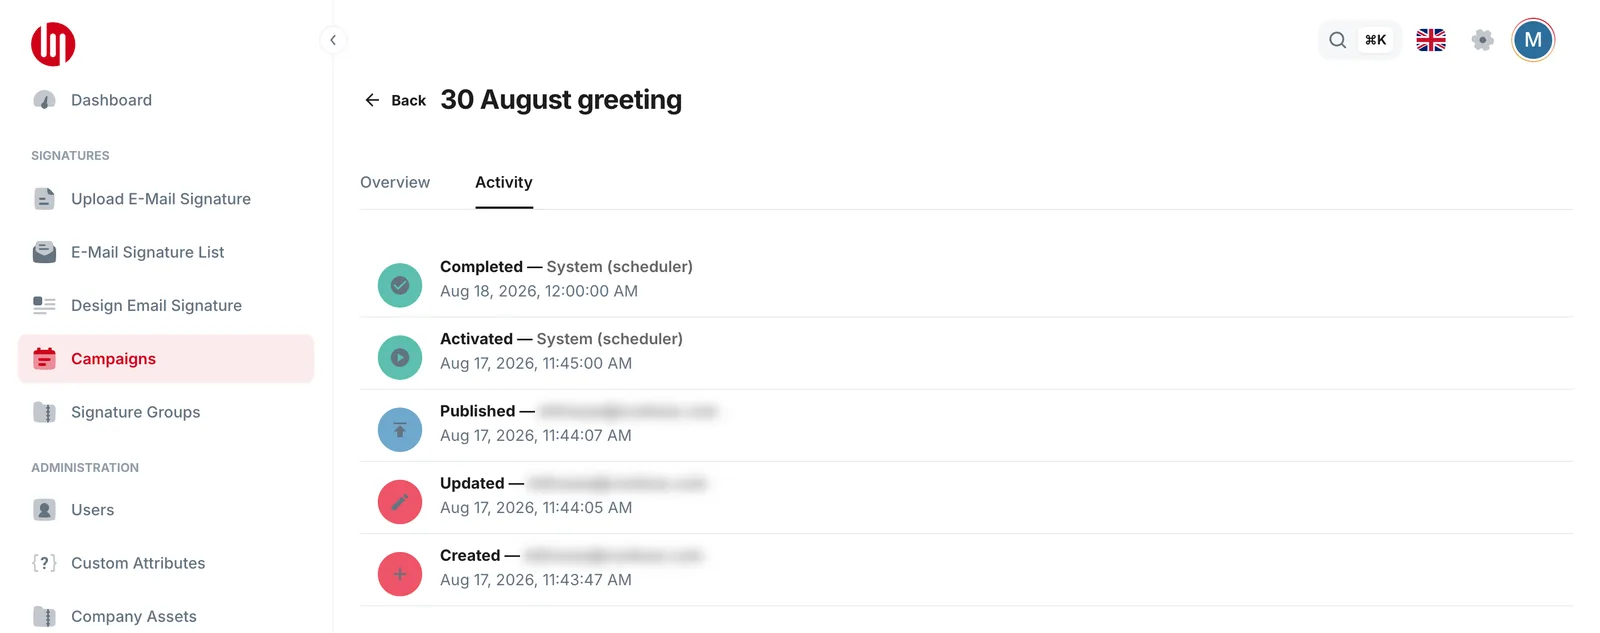
If two campaigns overlap for the same people, Mailtiv warns you before you publish. A campaign moves from Draft to Scheduled, Active and then Completed. You can cancel it at any time; people then go back to their fallback. The Activity tab shows what happened and when.
Custom Attributes
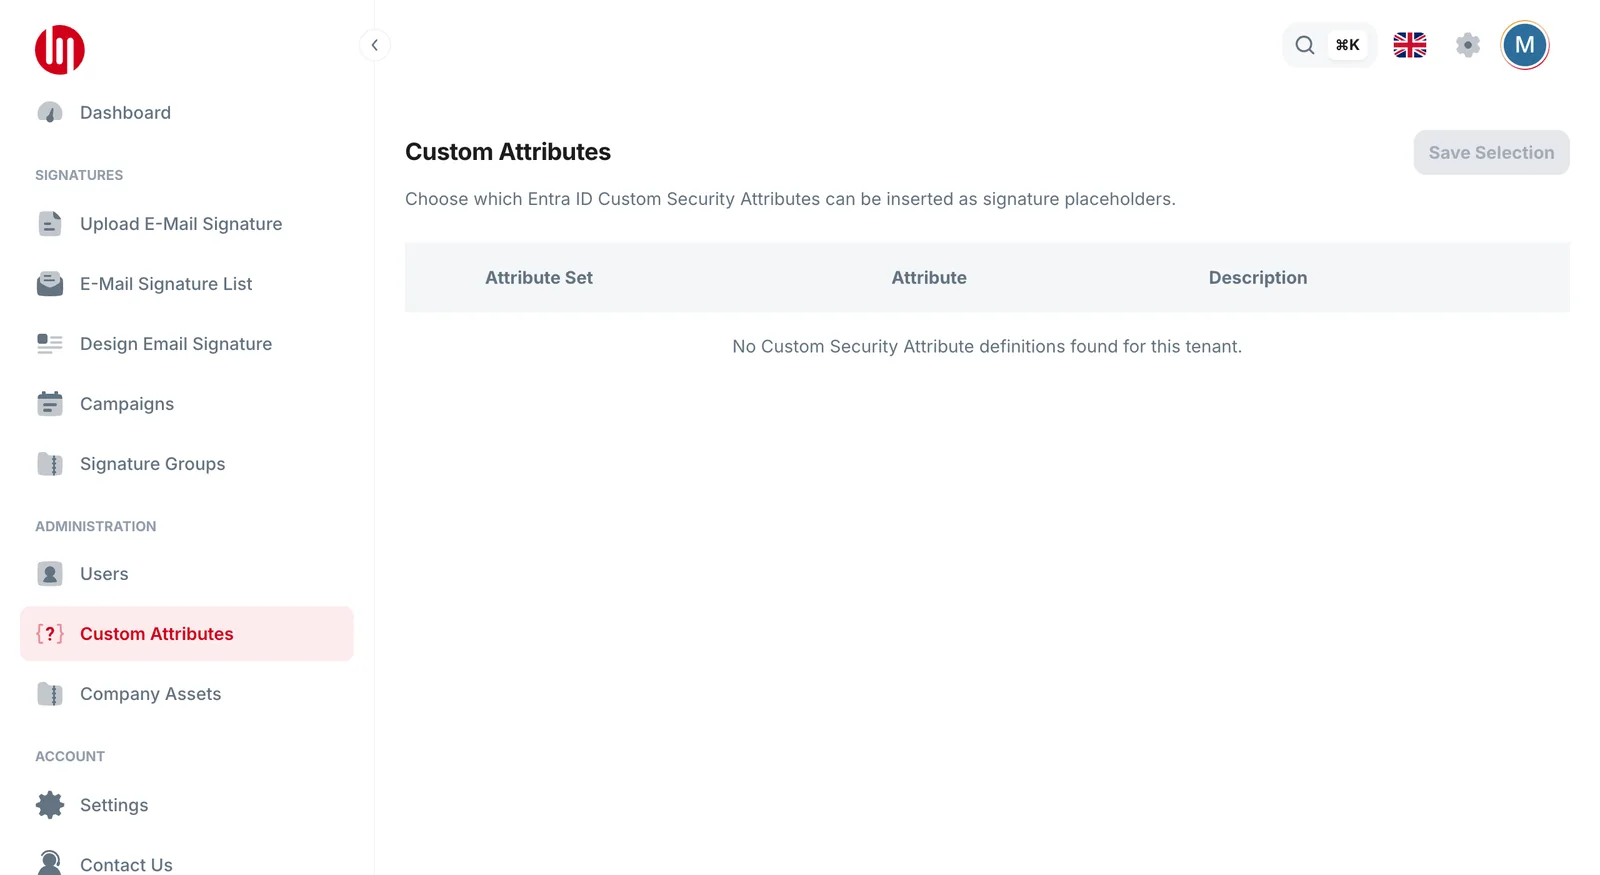
If your company uses Microsoft Entra custom security attributes (for example, a certification or a pronoun field), you can let them be used in signatures. Choose which ones and select Save Selection. The first time, Mailtiv asks for one extra permission (Grant permission); everything else works without it.
Users
- Give people the Admin, Contributor or Reader role, change it, or remove it.
- Download activity log gives you a file of who changed what in Mailtiv over the last 12 months.
Settings
- Admin consent: shows whether Mailtiv has everything it needs. If something is missing, an admin selects Update consent.
- Regional: your company timezone, used for campaign dates.
- Delete all company data: closes your Mailtiv account. See Removing Mailtiv.
Contact Us
Send us a question from inside the portal. The first time, you may be asked to allow Mailtiv to send the message from your mailbox.
Questions?
Book a meeting with our team or sign in to the portal.